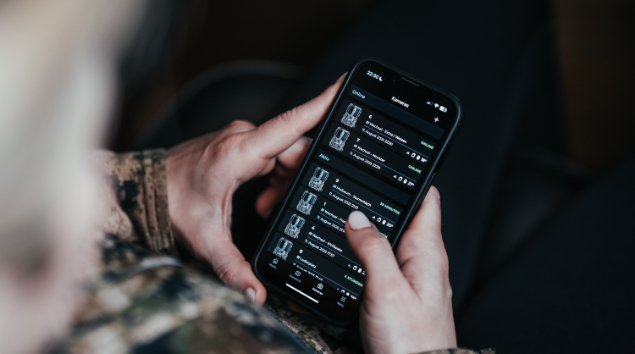
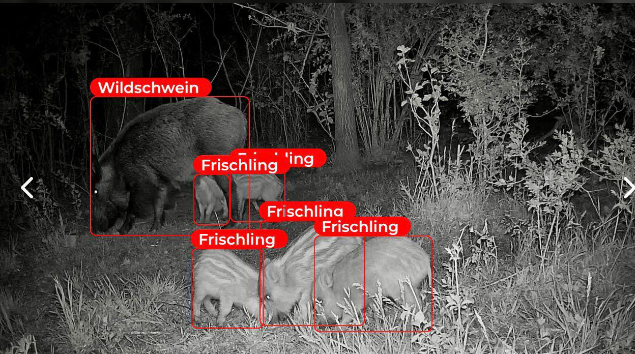
Den åpne viltkamera-appen
Designet for å fungere med våre GSM-viltkameraer, har vi utviklet Modernhunter-appen. I tillegg til våre kameraer fungerer appen med nesten alle GSM-viltkameraer som er tilgjengelige på markedet. Dette betyr at du ikke lenger trenger flere viltkamera-apper på smarttelefonen din. Last ned appen til smarttelefonen din i dag!

Alle funksjonene du trenger. I én app.
Modernhunter ble utviklet for jegere som ønsker å administrere sine viltkameraer profesjonelt. Uavhengig av merke - med vår app har du alle kameraene dine i oversikt og mottar bilder direkte på smarttelefonen din.
Ofte stilte spørsmål
Har du flere spørsmål? Kontakt oss.
Seissiger trail camera with Supersim (Supersim Edition)
Step 1: Add camera Open the Cameras page in the app menu. Tap the “+” icon in the top right corner. Select Standard Camera. Step 2: Select camera model Choose Seissiger as the manufacturer. Select Seissiger Universal as the model. Confirm with “Next”. Step 3: Set name and location Enter a camera name and the location name where the camera is installed. Then tap “Next”. Step 4: Skip SIM card step Since your camera uses a Supersim card, you do not need to add a Modernhunter SIM. → You can simply skip this step. Step 5: Complete setup Confirm all details. ➡ The camera will now be created in the system. Step 6: Enter forwarding email address Modernhunter automatically generates an individual email address for your camera. Copy this email address. Enter it in your Supersim account as the forwarding address. ✅ Done! From now on, your Seissiger camera will automatically send its recordings via Supersim to Modernhunter. The images will then appear directly in your Modernhunter account.
Set up SEISSIGER (Standard Version) with Modernhunter SIM card
This guide applies to SEISSIGER Special-Cam models in the standard version (SIM-lock-free), not to the SUPERSIM Edition. Follow these steps to set up your camera for use with the Modernhunter SIM card: 🪪 Step 1: Add the camera in Modernhunter Open the Modernhunter app or the Modernhunter web portal. Click on Cameras → “+” and select Standard Camera. Complete the setup until an individual email address is displayed. This email address is the recipient address to which your camera will send its photos. 👉 Copy or note this address. 💻 Step 2: Download PC program Download the Windows program “WirelessPlus 0.5”: Download link Open the program on your computer. 📂 Step 3: Load sample configuration file Click “Load…” at the bottom left and load the file “Seissiger_Modernhunter_Config.CFG” in the program. Sample configuration file This file already contains the most important settings (e.g., APN and network parameters). ✉ Enter the Modernhunter email address In the Recipients section, enter the email address generated in Step 1 into the field Email 1. 💾 Step 4: Save the file Save the settings using “Save as…”. Select file type: MMSCFG.BIN. Save the new configuration file directly to an SD card. 📸 Step 5: Load settings into the camera Insert the SD card into your SEISSIGER Special-Cam (standard version). Switch the camera to SETUP. Open the menu → 2G or LTE → Setup from SD and confirm the process. The camera will automatically load the saved settings. ✅ Done! Your SEISSIGER standard version is now connected to your Modernhunter account. From now on, it will automatically send all recordings via the Modernhunter SIM card to the generated recipient email address — the images will appear directly in your Modernhunter account.
Zeiss Secacam trail camera
With this guide, you can set up your Zeiss Secacam app so that recordings automatically appear in your Modernhunter account. Step 1: Add the camera in Modernhunter Open the Modernhunter app and go to Cameras, then tap the “+” in the top right. Select Standard Camera. Choose Secacam as the manufacturer and select any Secacam model. Tap “Next”. Assign a camera name and enter the location where the camera is installed. Skip the SIM step (Zeiss cameras use their own SIM). Confirm everything — the camera will now be created in Modernhunter. ➡ At the end, Modernhunter will give you an individual camera code, e.g., mh-123abc. You’ll need this later. Step 2: Forward recordings in the Zeiss Secacam app Since Zeiss no longer allows forwarding to our Modernhunter address, you will now use your own email address for forwarding. Open the Zeiss Secacam app. Go to Cameras and select the camera you want to connect. Tap the gear icon in the top right, then Notifications. Make sure Email notifications = ON and tap Save at the bottom. ➡ Zeiss will now send all new recordings to your email address. You can see which address this is in the app at the bottom right under Menu — your email is shown at the top. Step 3: Set up automatic forwarding & sorting To ensure recordings arrive at Modernhunter automatically and your inbox stays organized, create a rule: Open your email program (Outlook, Thunderbird, Gmail/webmail). Create a rule/filter/forwarding for incoming emails. Condition: if sender is pictures@secacam.email forward to: secacam@mh-cam.de move to folder: “Secacam” 💡 Tip: If the “Secacam” folder doesn’t exist yet, create it first. ✅ Result: All Zeiss photos are automatically forwarded to Modernhunter and simultaneously filed in the “Secacam” folder in your mailbox. Step 4: Adjust the camera name in Zeiss So Modernhunter knows which camera the photos come from: Open the camera in the Zeiss Secacam app, then tap the gear in the top right. Change the camera name to the individual code from Step 1, e.g., mh-123abc. Important: Enter the code exactly as shown in Modernhunter (no spaces/typos). 🎉 Done! Your Zeiss Secacam is now connected to Modernhunter. The camera sends its recordings to your email address; your mailbox automatically forwards them to Modernhunter and, in parallel, sorts the emails into the “Secacam” folder. This way, the recordings appear in your Modernhunter account as usual.
ICU trail camera
Step 1: Add the camera In the Modernhunter app, open the Cameras page in the menu. Tap the “+” icon in the top right. Select Standard Camera. Choose ICU Server as the manufacturer and then select an ICU model. Confirm with Next. Assign a camera name and enter the location where the camera will be installed. Skip the SIM step (ICU cameras only use their own SIM). Confirm everything — the camera will now be created in Modernhunter. Modernhunter will then generate a code for you. This code will look like “mh-xxxxxx”, where xxxxxx represents your individual 6-character code. Step 2: Set up email forwarding Open the ICU app and tap your profile photo in the top right. Select Email forwarding and then tap + Add email address. Enter the following address exactly as shown: icu@mh-cam.de From that moment on, all recordings from your ICU account (from all cameras) will be automatically forwarded to Modernhunter. Step 3: Adjust the camera name To ensure that the recordings are correctly assigned to the corresponding ICU camera in Modernhunter, you need to change the camera name in the ICU app. In the ICU app menu, go to Cameras, select the camera you want to link, and tap the pencil icon next to the current camera name. Change the camera name to the individual code generated in Step 1: “mh-xxxxxx”. Important: The name must contain the code exactly as shown in the Modernhunter app (no spaces or typos). ✅ Done! Your ICU camera is now connected to Modernhunter. From now on, all recordings will be automatically forwarded to Modernhunter and will appear directly in your account.
Dörr trail camera
Information coming soon.
Spypoint trail camera
Information coming soon.
How can I enable or disable push notifications?
Push notifications can be turned on or off in the app. To do this, open the side menu, go to Settings, and scroll down to find the option Enable notifications.
How can I share recordings with friends for free?
🔗 Connect contacts Before you can share camera locations and their recordings with other users, you first need to connect your account with your friend’s account. Here’s how: Open the Modernhunter app → Menu → Contacts. Option A: Tell your friend the code shown at the top of your contacts page. Your friend enters this code using the keyboard icon (1) in the top right corner. Option B: Show your friend the QR code from your contacts page (Show QR Code), and they scan it using the camera icon (2) in the top right corner. Your friend will receive a contact request and confirm it. → You are now connected and can share camera locations with each other. 📍 Share location Open Menu → Locations. Select the desired location and tap the gear icon (⚙) to open the location settings. At the bottom, you can select which contacts should have access to this location. 🔒 Set permissions 🔒 Closed lock: View-only access (can see recordings). 🔓 Open lock: Full access (can control cameras, request HD recordings, delete recordings).
What can I view and manage on the camera page?
On the Camera page, you’ll find an overview of all your connected cameras. At a glance, you can see: The location where each camera is currently installed The date and time of the last contact with the server The time elapsed since each camera was last online When you tap on a camera, the detailed view opens. Here, you’ll find extensive information and control options. Camera information: Battery level Used storage space on the SD card Signal strength Temperature SIM card information Actions and settings: Format SD card Restart camera Start network search (to find the best available network) To adjust camera settings, open Camera Settings. This way, the app gives you a complete overview of your cameras at any time — allowing you to manage them remotely without having to be on-site.


