
Why there's a new app
The most important reason is you. Many of you have written to us – about features missing out in the field, and about small things that get in the way day to day. We listened, fixed the bugs you reported and put your suggestions into practice.
There was also an external trigger: the Modernhunter app was briefly unavailable in the Google Play Store. Rather than simply pushing out an update afterwards, we took the opportunity to release the app completely anew – with the fixes from your feedback and the new features this guide introduces.
To make sure you're working with the latest version, we recommend: delete the old Modernhunter app completely from your smartphone and then download it again from the App Store or the Google Play Store. After that, simply log in as usual with your existing credentials.
Note for Android: The new app installs as a separate app – afterwards you’ll have two apps named “Modernhunter” on your phone: the old one and the new one. Be sure to delete the old one so you don’t accidentally open the outdated version.
Your recordings are kept safe in the process – they're stored on our server, not on your phone.
Home – your recordings
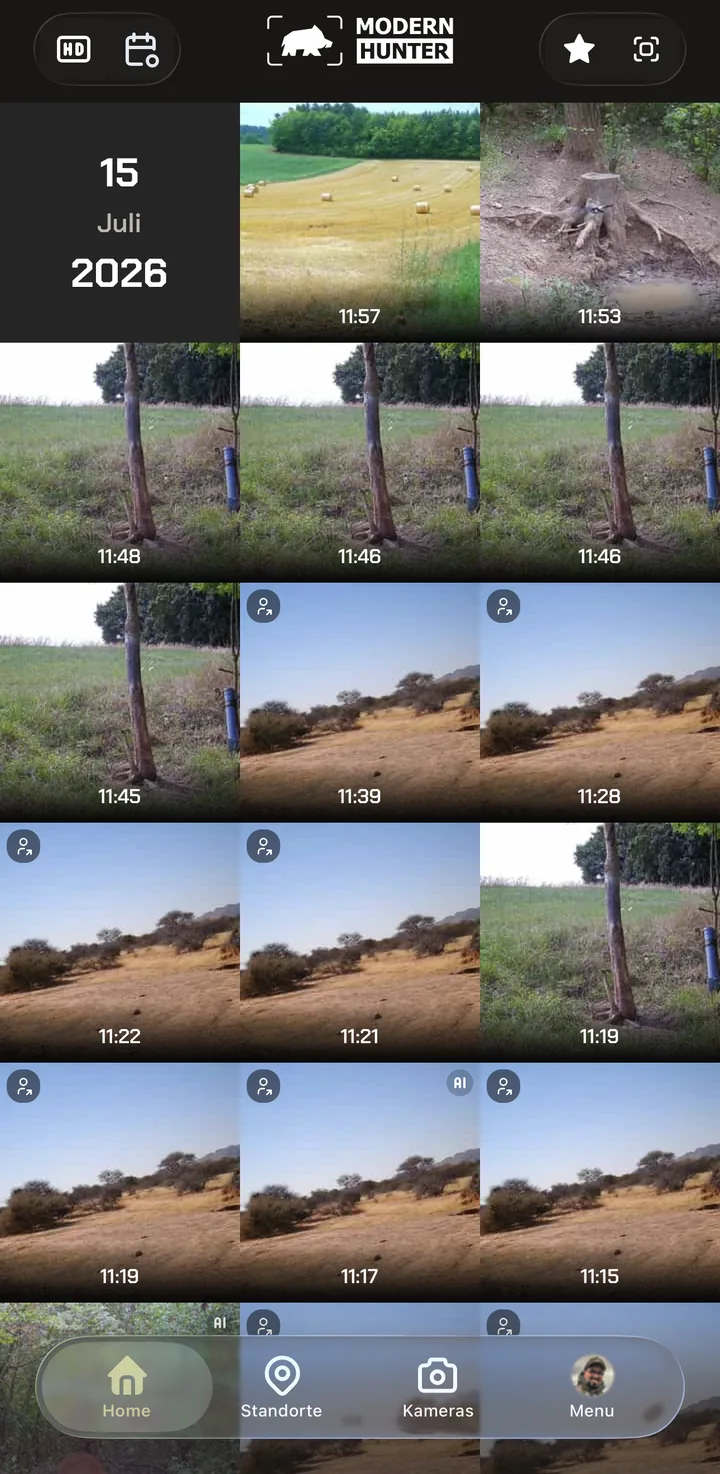
The home screen shows all recordings from all cameras. Four filters in the top bar decide which of them you see.
The home screen – everything at a glance
When you open the app, you land right at your recordings. They're grouped by date – the day appears to the left of each row of images, with the newest recording at the top. Every tile shows the time it was triggered.
The bottom bar takes you to the four sections of the app: Home with all your recordings, Locations for your territories, Cameras for the individual devices and Menu for account and settings. This guide follows exactly that order.
At the top are the four filters: HD and Calendar on the left, Favorites and AI on the right.
- Home – all recordings from all cameras, by date
- Locations – recordings sorted by location
- Cameras – individual devices, status and settings
- Menu – account, credit, settings
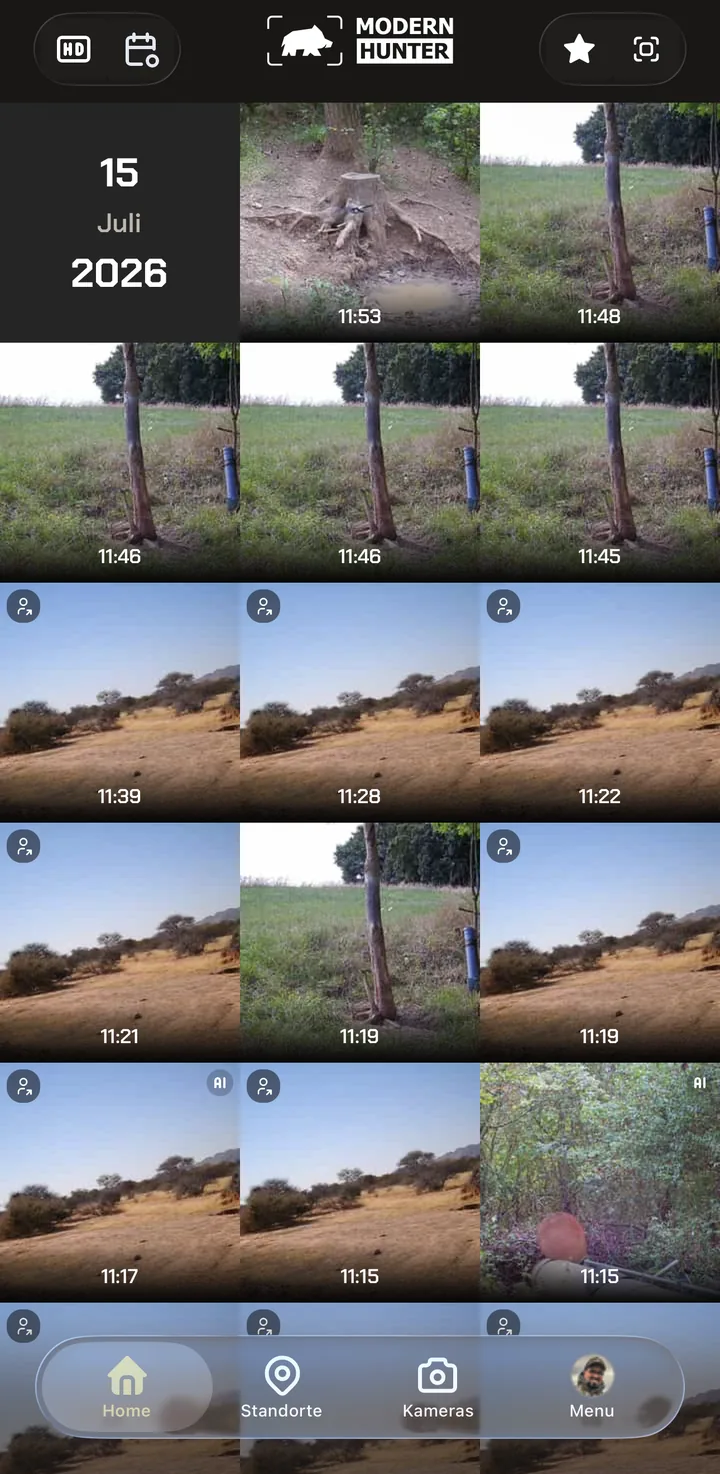
The HD filter – only the sharp images
Your Modernhunter camera “Hunter 4G Mini” transmits only a small preview image with each trigger. That saves data and credit. You can request the high-resolution original recording; it then replaces the preview image. A push notification lets you know as soon as the HD recording has arrived.
Using the HD filter at the top left of the home screen, you filter the view for HD recordings so that only those are shown. They're also marked with a yellow HD icon.
There's no switch to turn HD off – HD is never transmitted automatically. If you want to save credit, simply don't request the HD version.
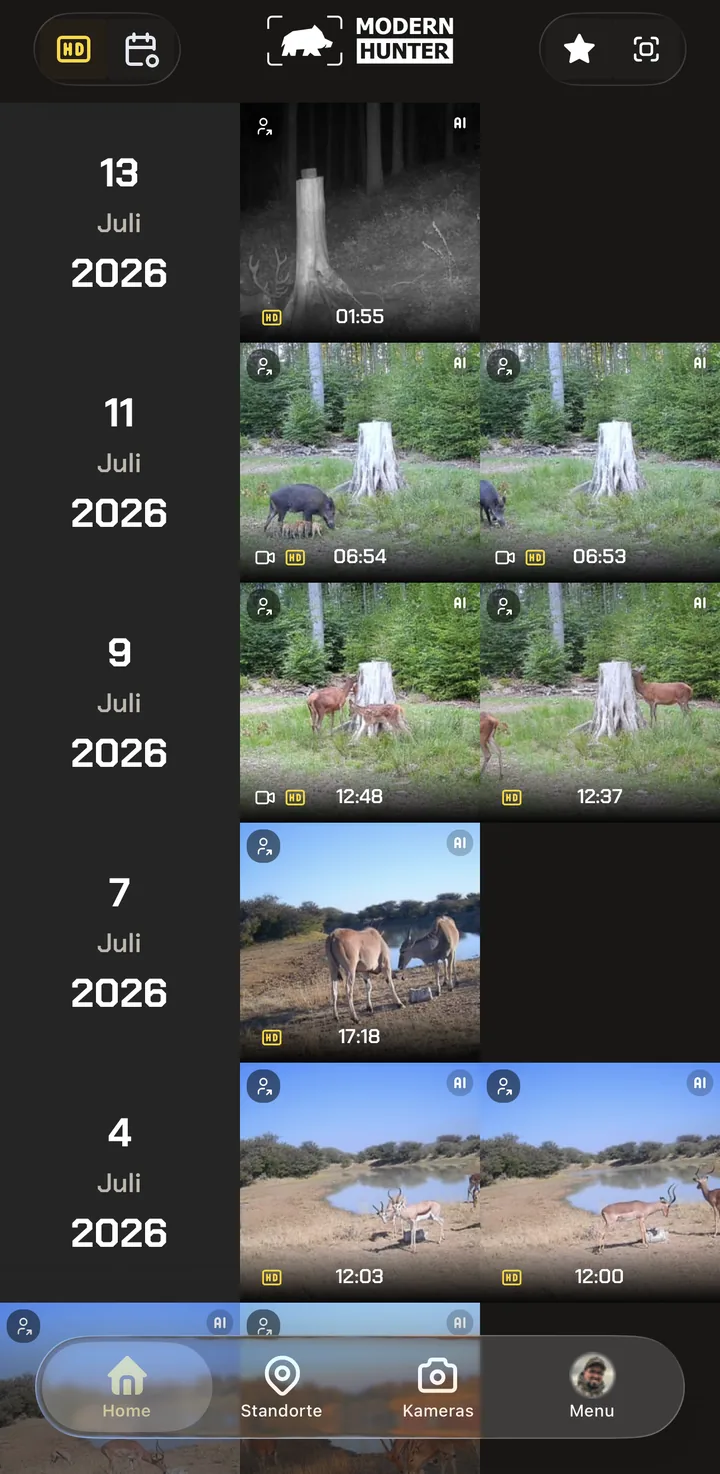
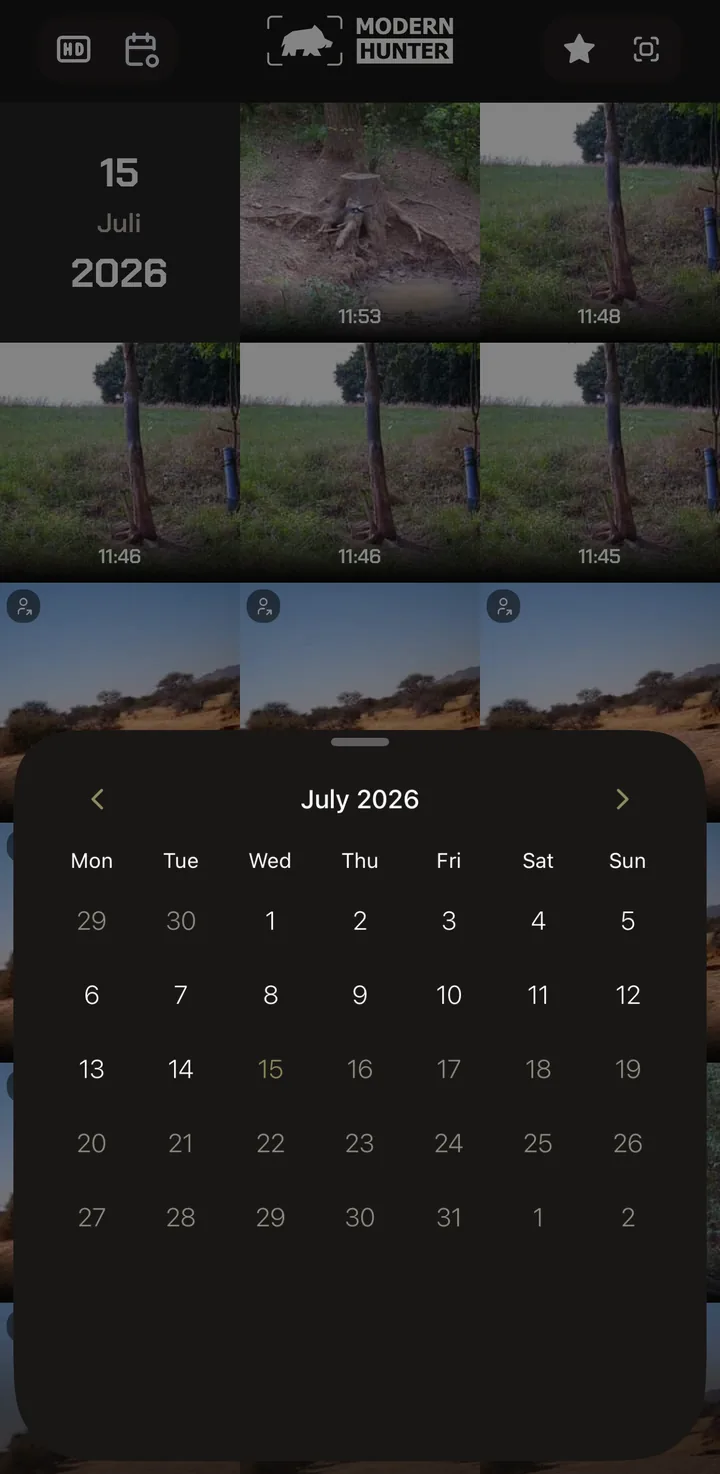
The calendar – jump straight to a day
Instead of scrolling through weeks, tap the calendar icon at the top left. A month overview opens.
The current day is highlighted in olive. Use the arrows on the left and right to change the month; tapping a day jumps straight to its recordings.
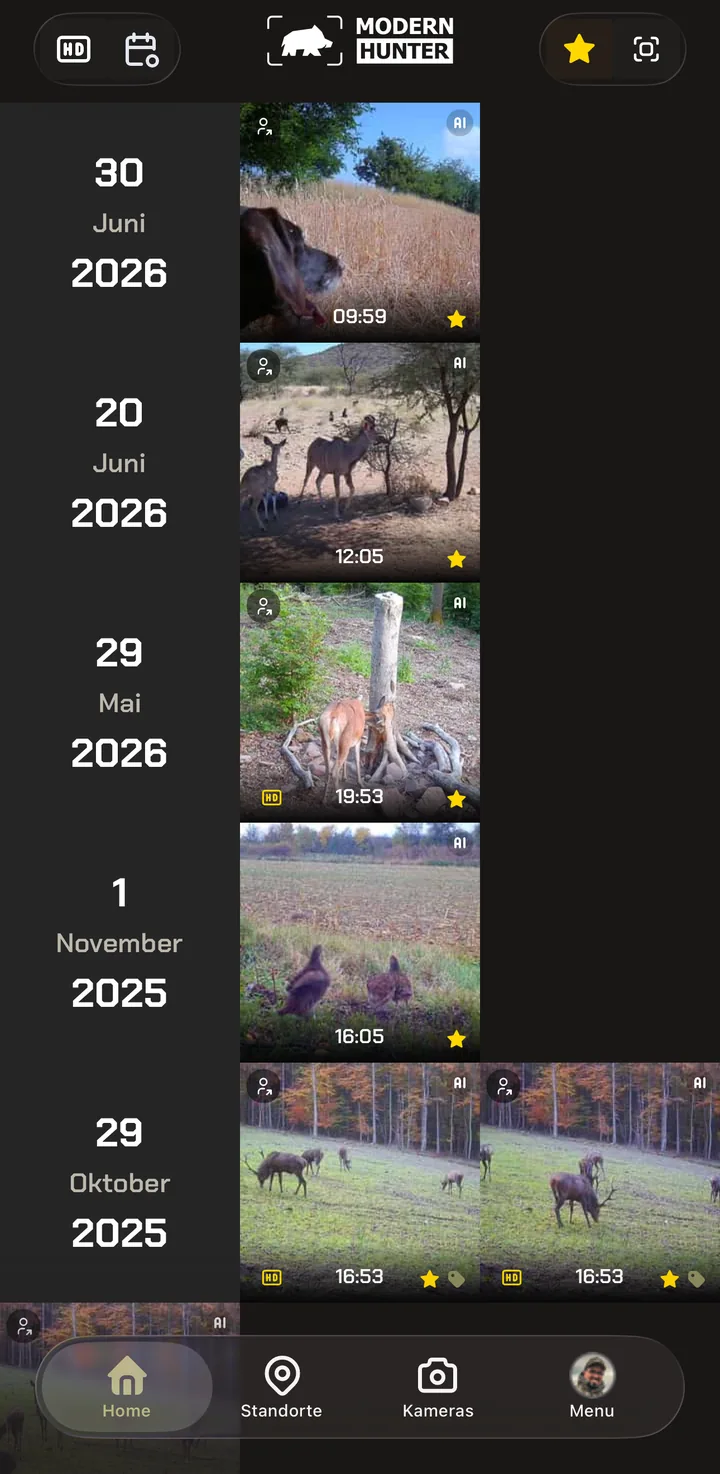
Favorites – find the good images again
To mark a recording as a favorite, open it and tap the star at the bottom. The recording is now a favorite – and is never deleted automatically.
Using the star icon at the top right of the home screen, you then hide everything except your favorites. The filter works across the entire time span: in the example, recordings from June 2026 sit right next to ones from October 2025. Your best images from years gone by are all in a single view.
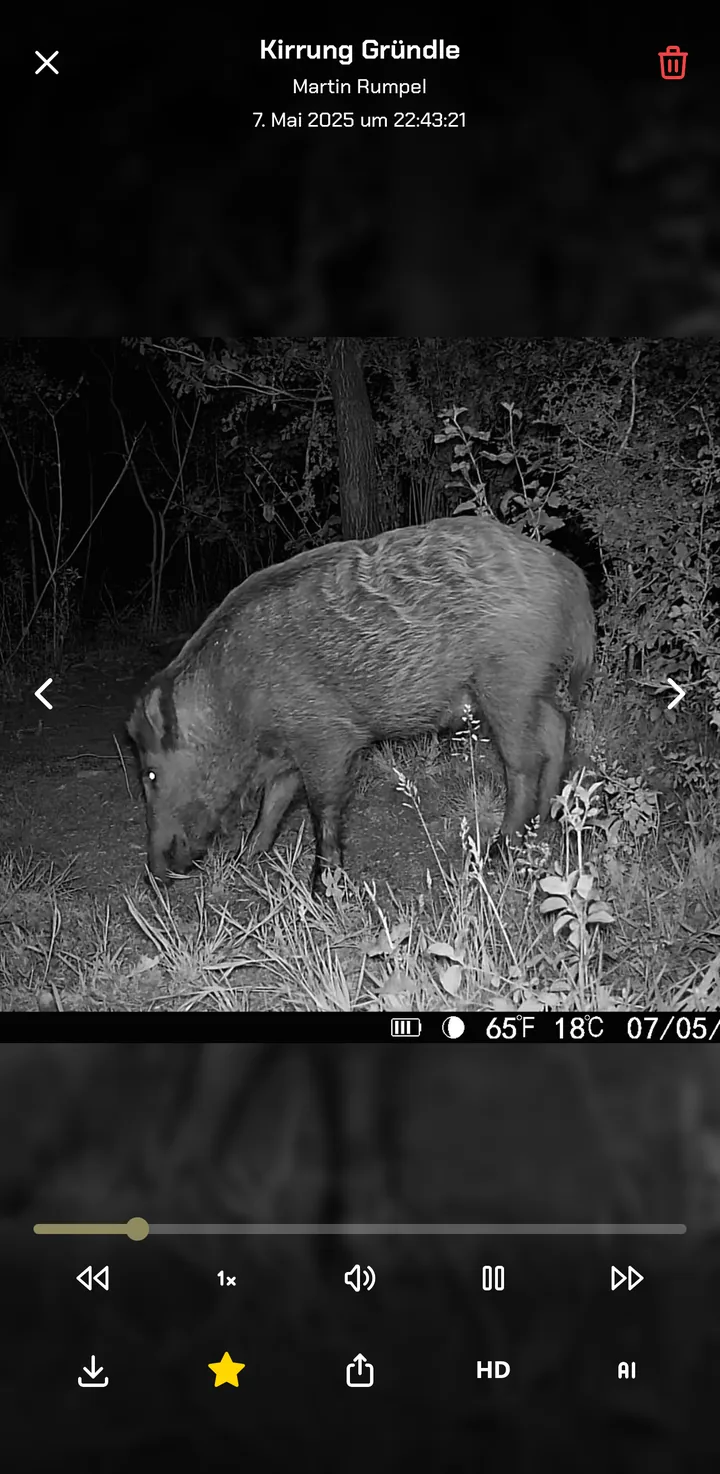
The detail view – one image, all the actions
Tapping a tile opens the recording at full size. At the top are the location and the exact time of the recording. If the recording comes from a camera that someone has shared with you, you'll also see the camera's owner here. To browse, use the arrows on the left and right – or simply swipe from image to image. Many users had asked for this swipe gesture; in the new app it's now included.
For videos, a full player appears with a timeline and sound. The playback speed (1x = normal speed, 0.5x = half speed) can be adjusted – handy for watching a fast movement at your leisure. Using the arrow buttons at the bottom, you can also jump two seconds forward or back at a time to watch a part again.
The bar at the very bottom bundles all the actions for the recording:
- Download – save the recording to your device
- Favorite – mark the recording with the star
- Share – pass the recording on, for example via WhatsApp
- HD – request this recording in HD from the memory card (only on the Hunter 4G Mini cameras from Modernhunter)
- AI – turn the AI object recognition for the recording on or off
The AI filter – hide empty triggers
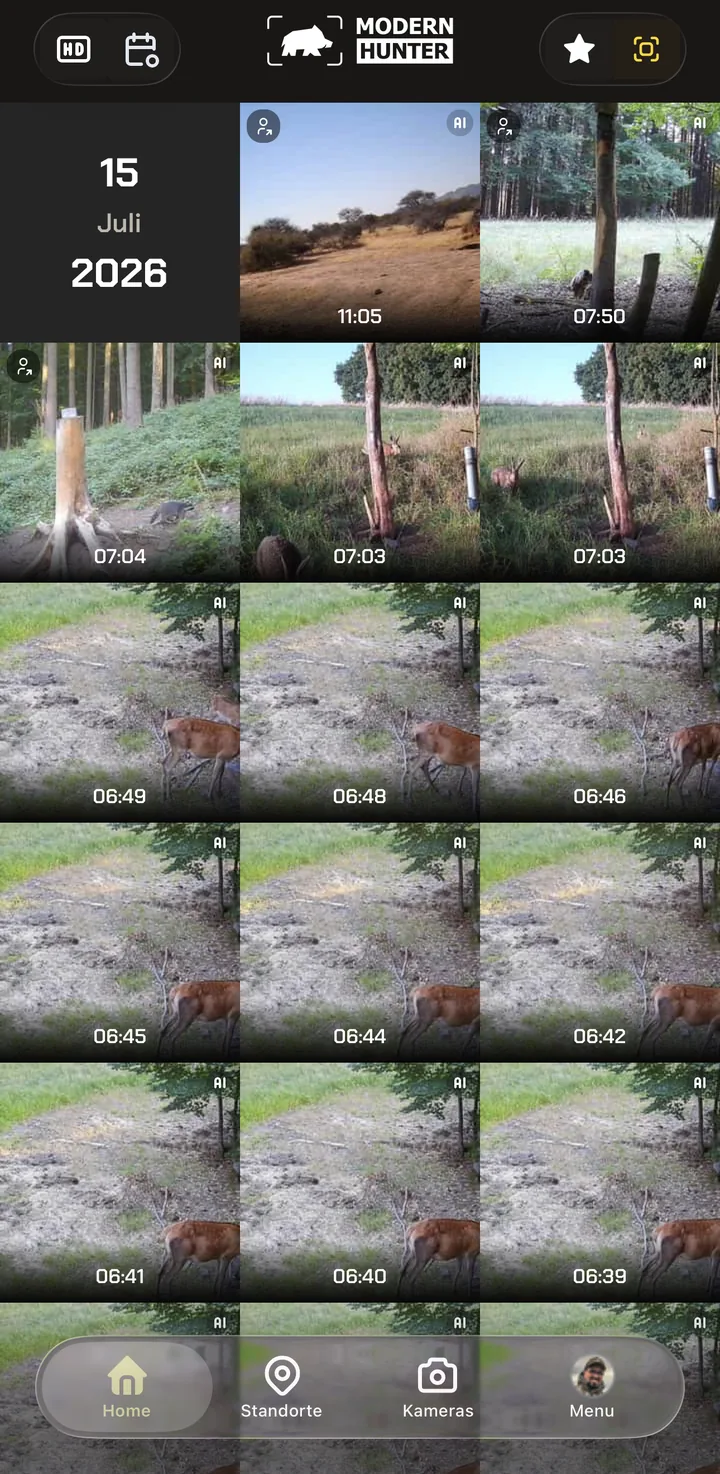
Wind in the grass, a branch, a bird – part of every camera's haul simply shows nothing. The Modernhunter AI checks on our server, not in the camera, what can be seen in an image, and marks recognized recordings with an AI icon.
Tapping the AI icon at the top right hides two things at once: empty triggers with no recognizable subject and recordings that show only birds. That way you don't have to click through countless false triggers and pigeon photos to get to the relevant recordings.
Important: the camera still sends all recordings – the AI only filters the display. Nothing is lost; you can turn the filter off again at any time.
Four filters,
one motion
The four filters on the home screen can be combined freely: HD and AI together show the sharp images with recognized game. Favorites and Calendar together bring up the best recordings from a particular day.
No filter changes your recordings – they all stay saved and are back again once you turn the filter off.
- HD – only recordings with a high-resolution version
- Calendar – straight to a particular day
- Favorites – only recordings marked with a star
- AI – only recordings with recognized content
Locations – recordings by location
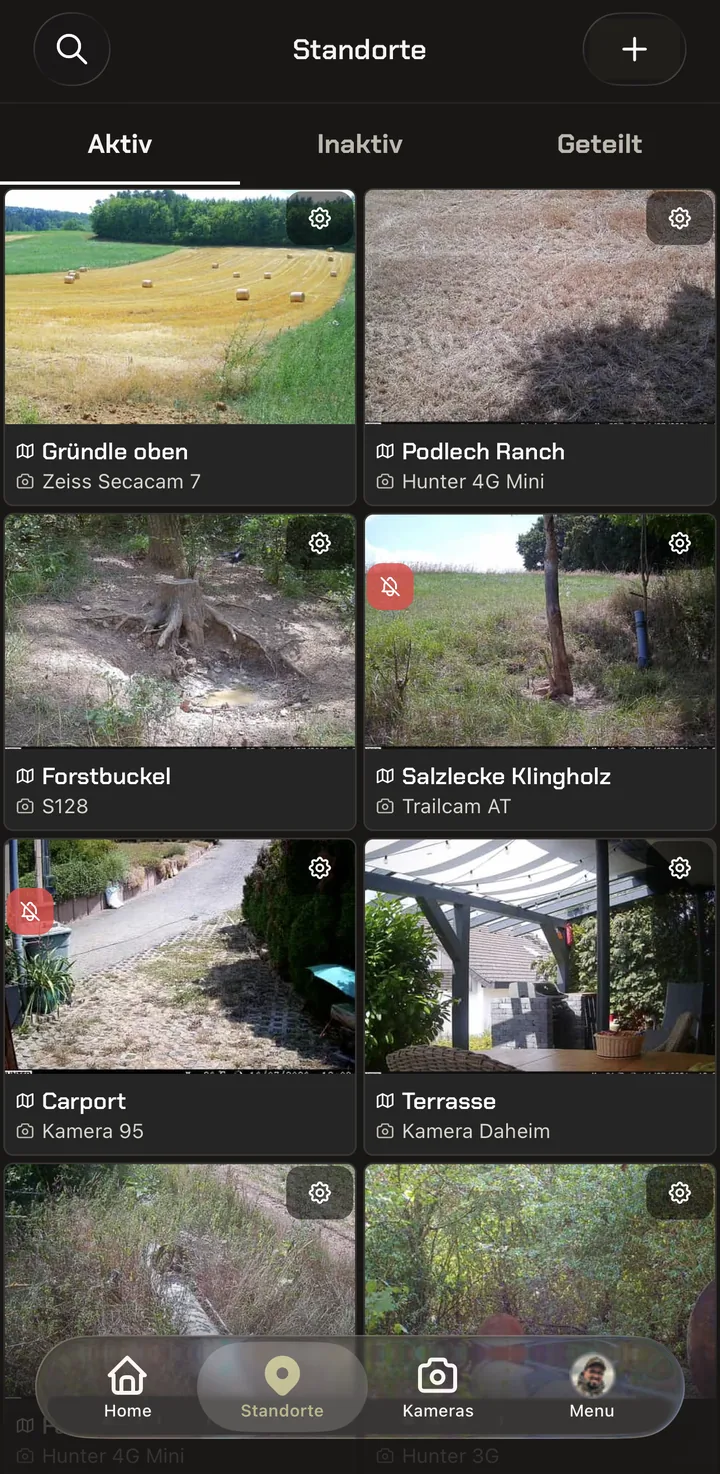
Out in the field there are several interesting spots that you monitor with one or more cameras: a game trail, a wallow, a salt lick or the rutting meadow.
In the app these are your locations. One or more cameras send to the same location – so all recordings from one spot are always neatly gathered in a single folder.
Location settings – and what was happening on site?
In the overview, each location tile has a small gear icon at the top right. Tapping it opens the settings for that location.
At the very top you see which cameras are assigned to the location – that is, which devices send their recordings into this folder.
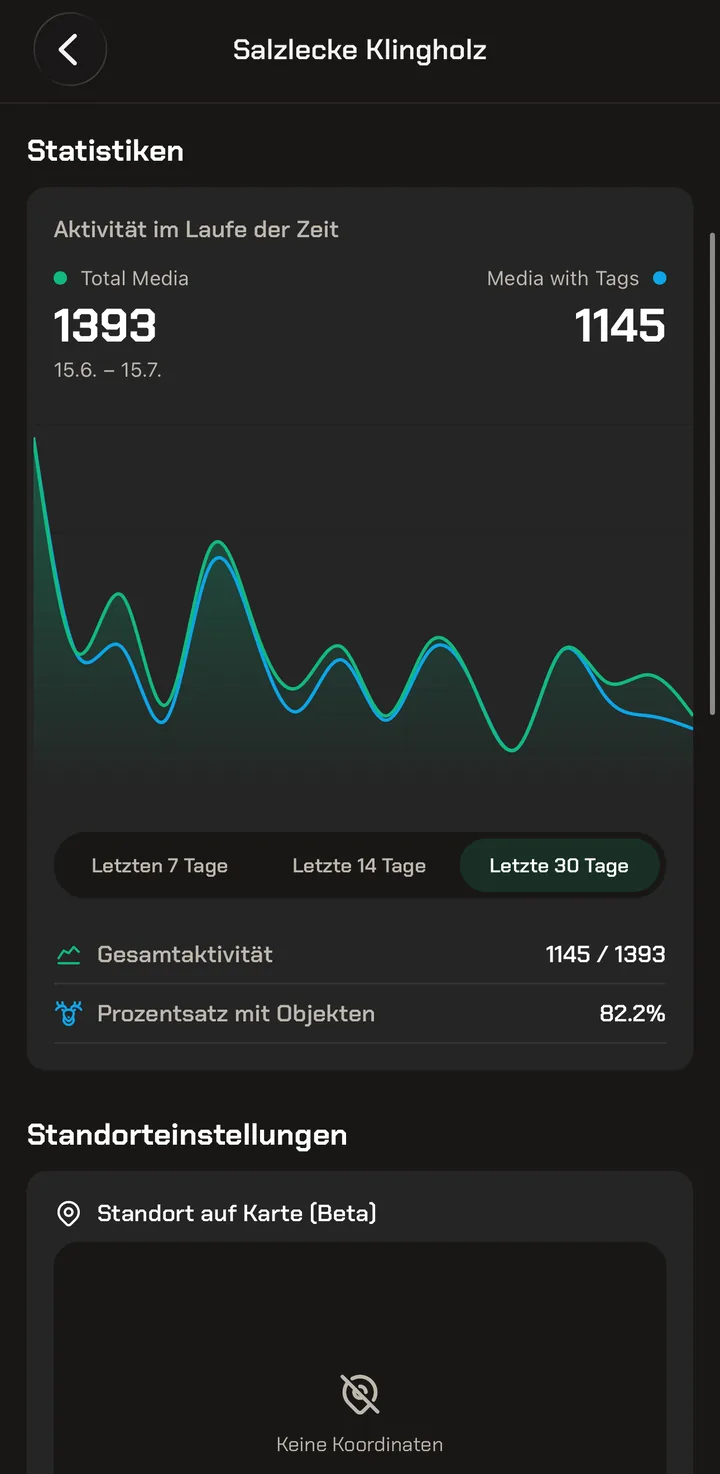
Below that comes a statistics section: it shows how many recordings came in over the past days and on how many of them the AI recognized something. Use the buttons to change the time period – 7, 14 or 30 days.
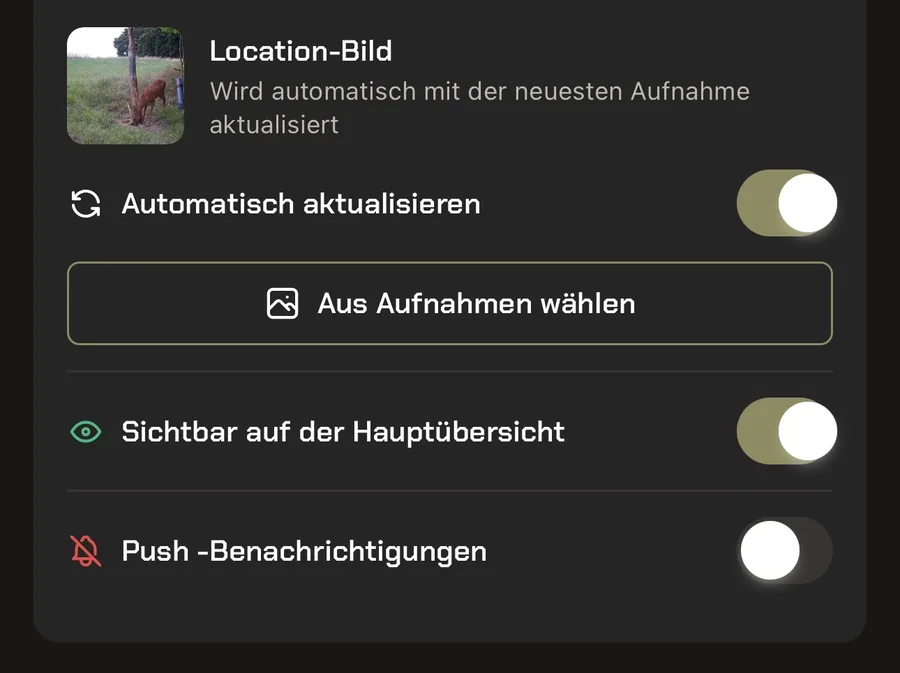
Each location also has a preview image. By default it updates automatically with the newest recording. New: you can instead set a fixed photo per location – turn off “Automatically update” and choose an image via “Choose from recordings”. The overview then no longer shows the latest recording, but exactly this one. A customer request we've implemented.
With “Visible on the main overview” you hide a location from the home screen without deleting it – handy for territories that aren't of interest right now. The “Push notifications” switch controls the notifications for this one location.
Cameras – your toolbox
The overview of all your cameras: the status of each camera and when it was last connected to your account. From here you set up every camera and control it remotely.
Two views – grid or list
At the top is the summary of your fleet: how many cameras you have in total and how many of them are active, in warning or offline. The Own and Shared tabs separate your devices from those that others share with you.
Using the icon at the top right, you switch between two views – this choice is new. The grid places two cameras side by side – compact when you have many devices. The list gives each camera a whole row and additionally shows the last contact with date and time.
Both show the same key metrics: reception, battery, used SD card and temperature, plus the status as a colored marker.
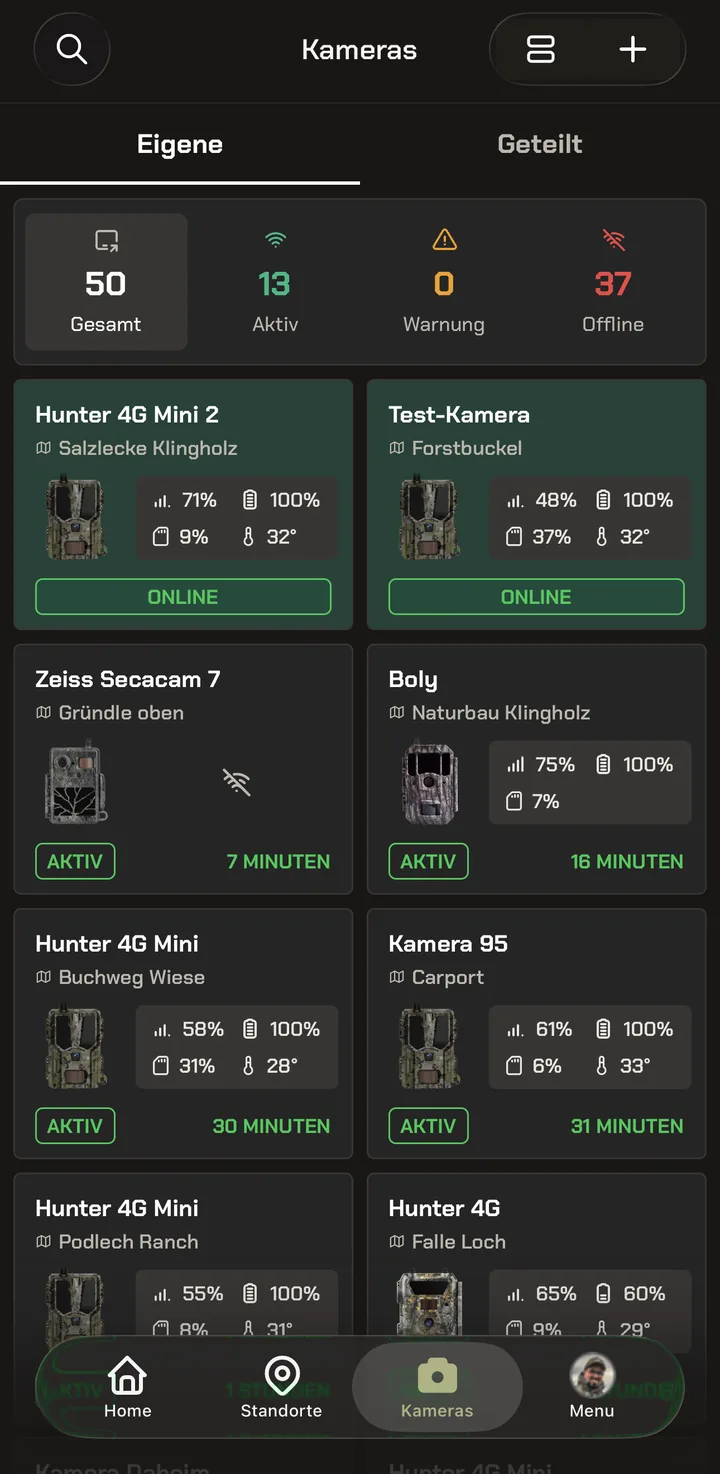
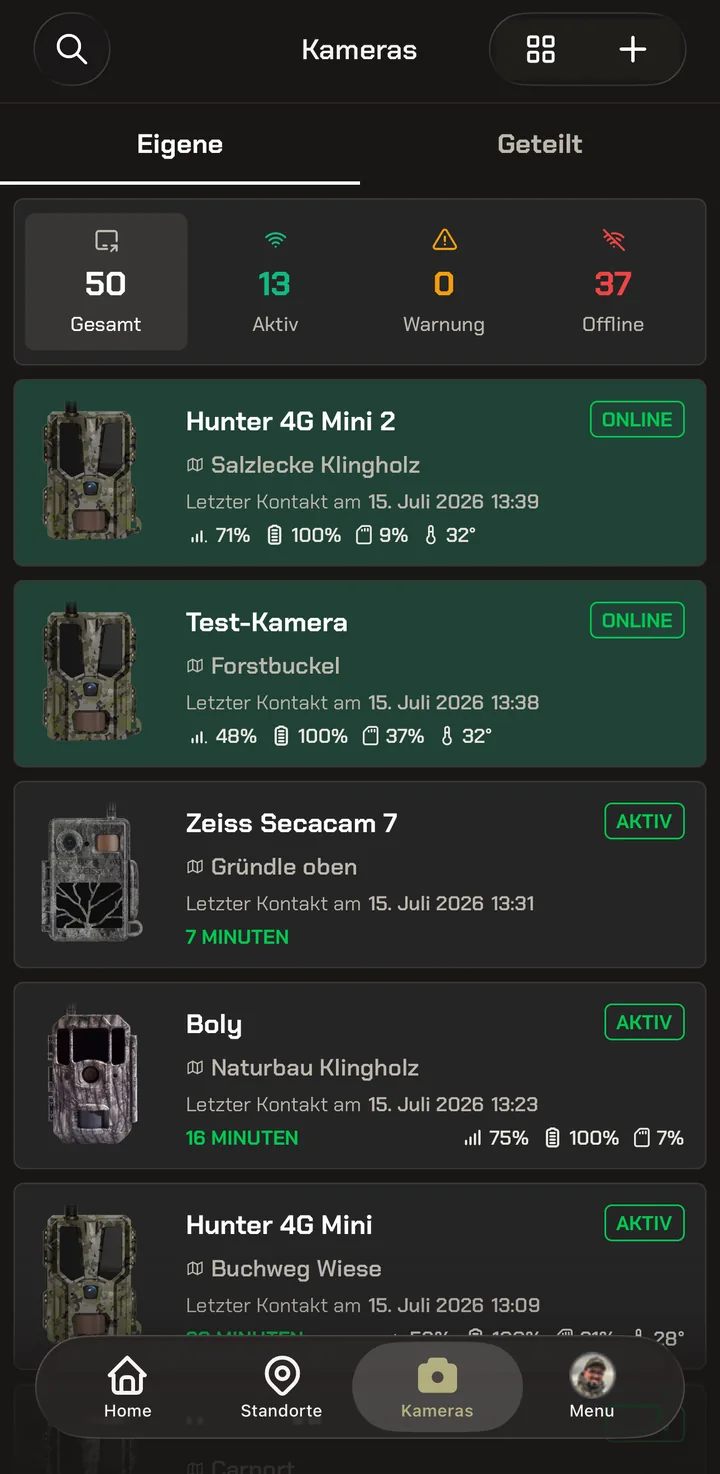
The status – Active, Warning or Offline – indicates whether the camera checks in with your account regularly. “Offline” doesn't mean the camera has been switched off: it means it hasn't checked in for more than 48 hours and is therefore evidently no longer reachable – offline, in other words.
- Active – image or report within the last 24 hours
- Warning – nothing for 24 to 48 hours
- Offline – nothing for more than 48 hours
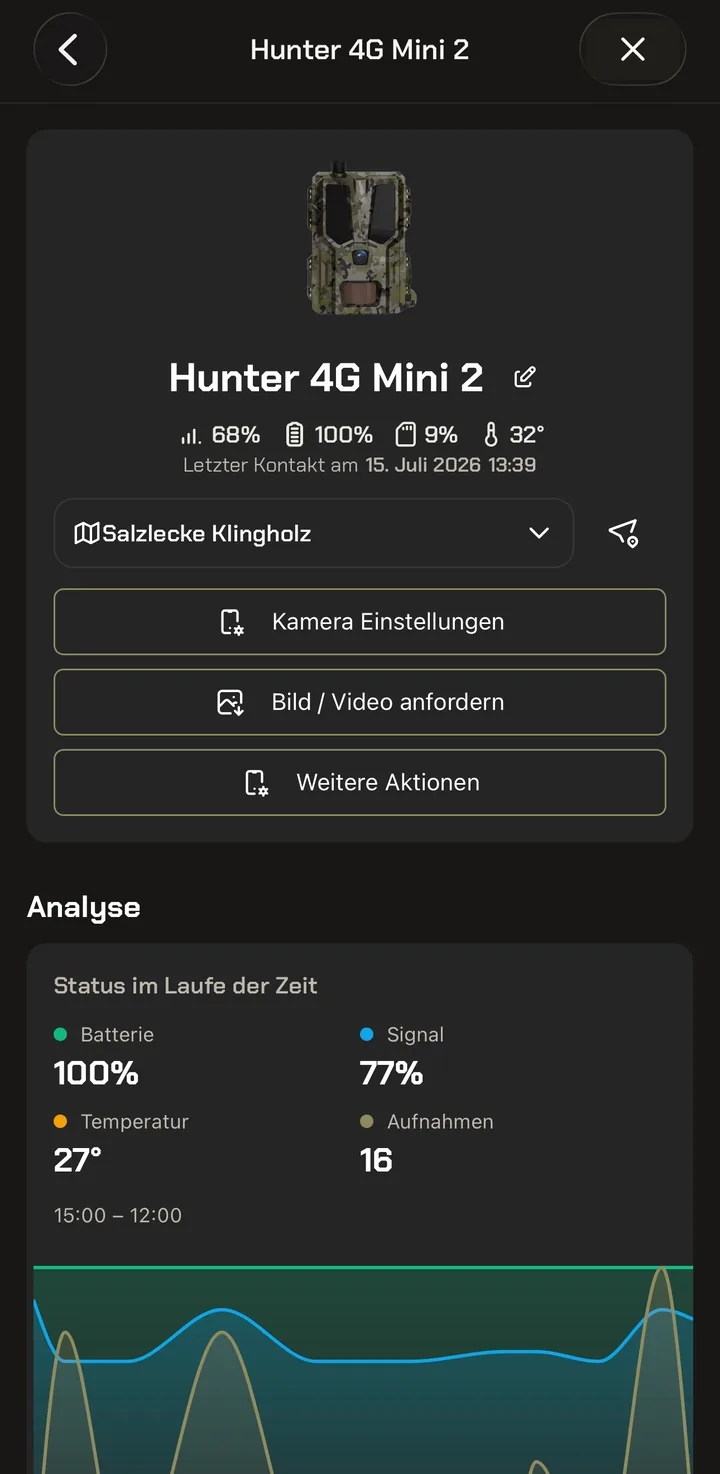
The camera in detail – condition and history
Tapping a camera opens its detail page. At the top are the name, key metrics and the last contact; use the pencil icon to rename the camera, and the field below to assign it to a different location.
Three buttons take you further: Camera settings for control, Request image / video for a recording on demand and More actions for maintenance commands. These three buttons are explained in more detail in the following chapters.
Below, the analysis records the history of battery, signal, temperature and number of recordings. This lets you spot whether a camera is slowly weakening before it fails.
Camera settings – control the camera remotely
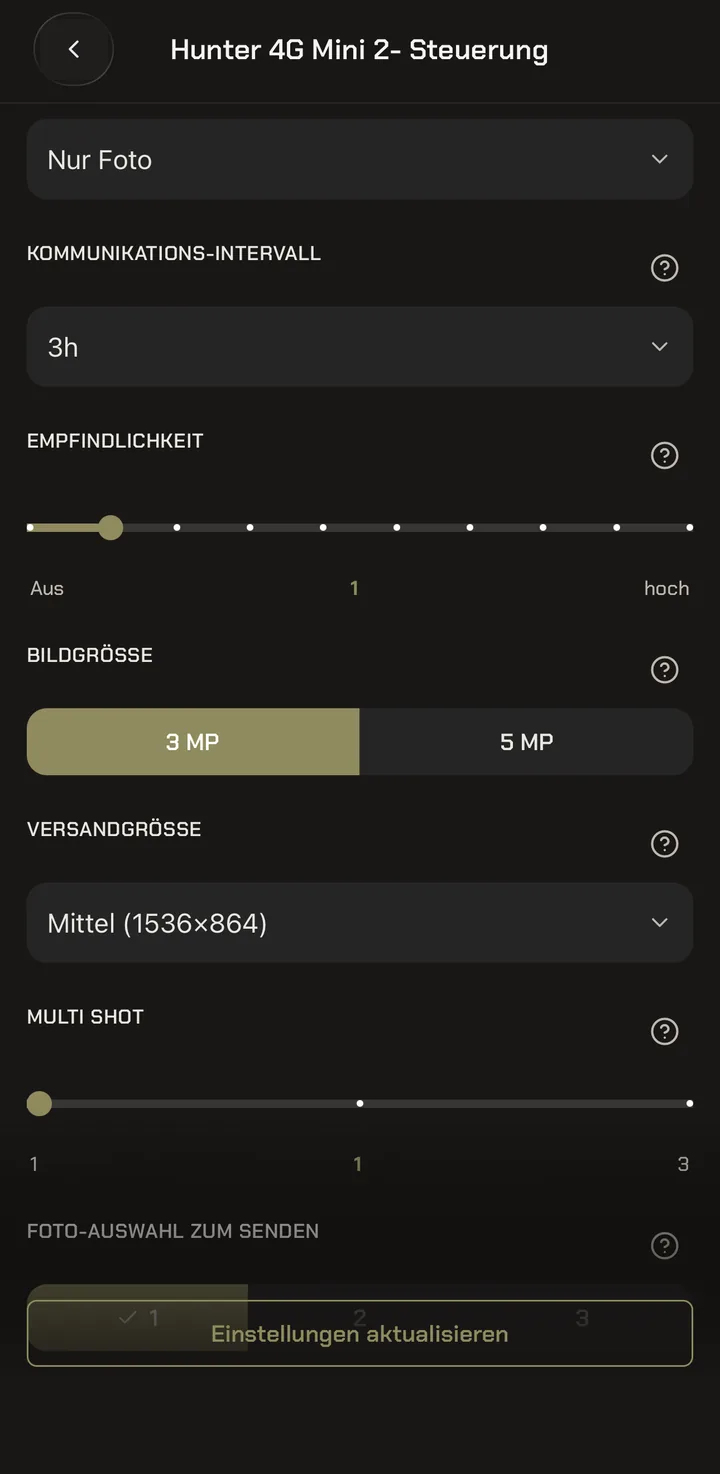
Under Camera settings you reconfigure the camera without driving out to the field: operating mode (such as Photo only), communication interval (how often the camera checks in with your account automatically), motion sensor sensitivity, image size, transmission size and Multi Shot.
A note on the interval: you should only use the real-time level with an external power source – in continuous operation it puts heavy strain on the battery.
Next to every setting sits a question mark – that's new. Exactly when you wonder what a setting is for, a tap on it delivers the answer straight away. So you don't have to guess what distinguishes “transmission size” from “image size”.
At the end, you send everything to the camera with “Update settings”.
The image size determines what the camera photographs with. The transmission size determines how much of that is transmitted – and therefore how much credit a recording costs. On the Hunter 4G Mini, the small transmission size is recommended for the preview: that way you safely stay at just one Coin per recording – and can request the HD version afterwards at any time.
More actions – maintenance from a distance
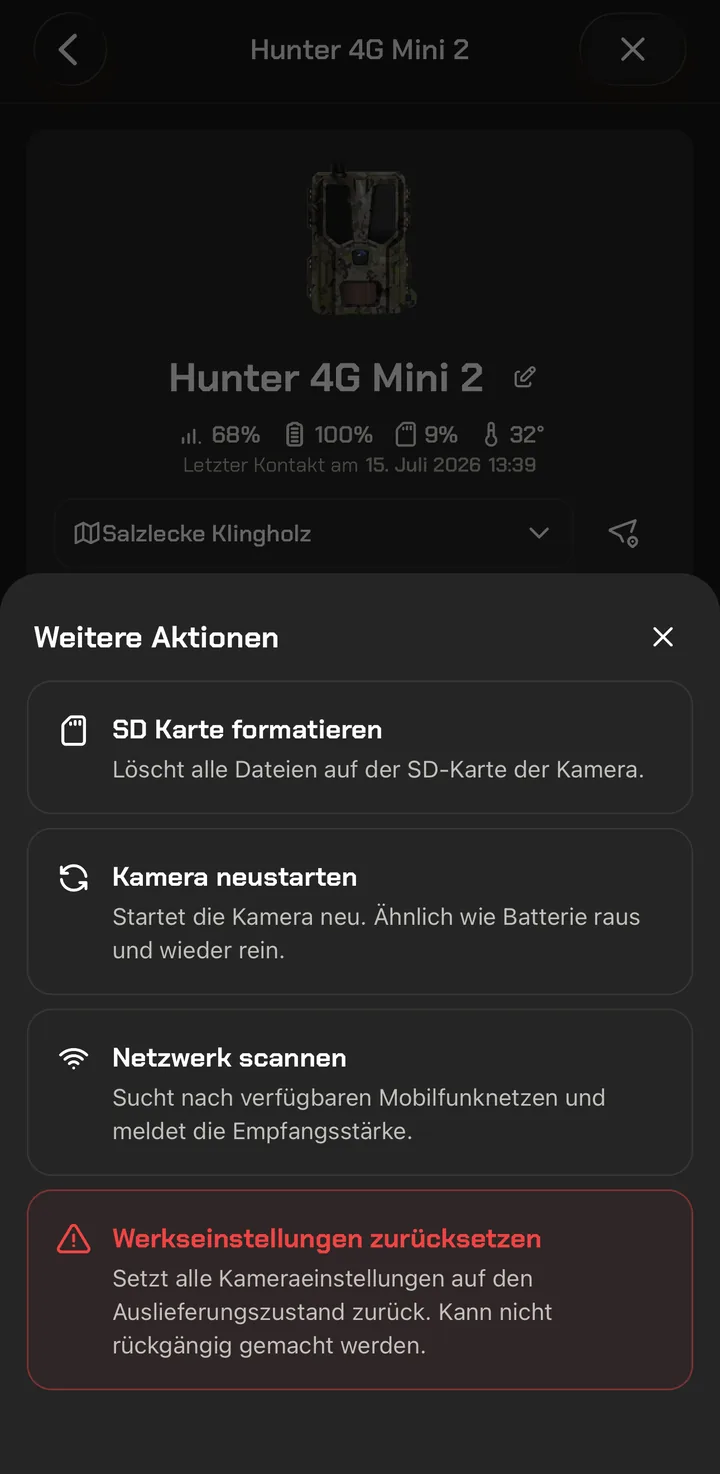
Behind More actions lie the commands you rarely need – and then urgently. Each one is explained in a single sentence, so it's clear what happens.
Format SD card deletes all files on the card in the camera. Restart camera is the equivalent of “take the battery out and back in”. Scan network searches for available mobile networks and reports the signal strength – helpful when a camera has poor reception.
If you send the camera “Reset to factory settings”, it returns to exactly the configuration state it was delivered in – all your settings are lost in the process, and this cannot be undone. That's why the app deliberately highlights this command in red.
The queue – when the command arrives
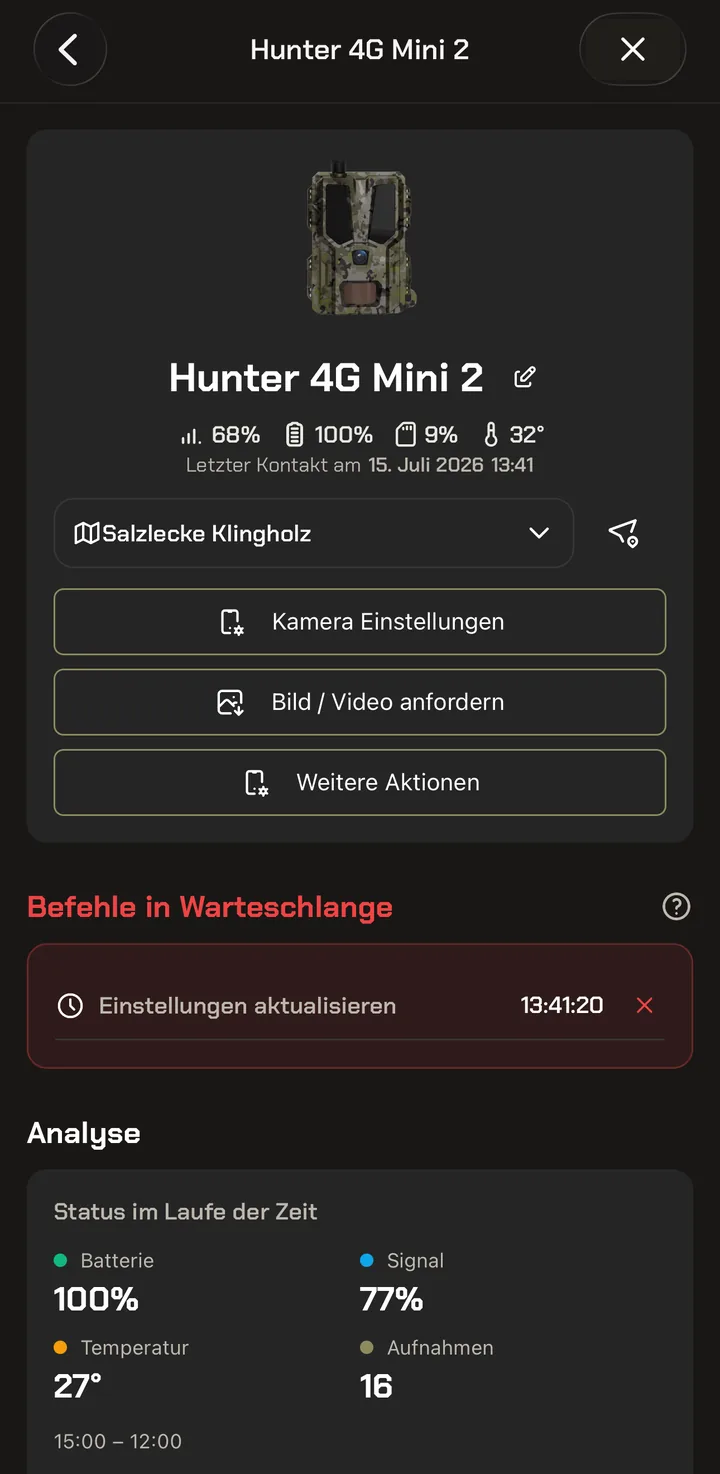
A wildlife camera doesn't listen continuously. In the queue, therefore, all the commands you send to the camera collect – changed settings, a recording requested via Request image / video and the commands under More actions.
The queue is processed at the camera's next contact with your account. That's either the communication interval – or the moment when the camera sends a recording anyway because it has detected movement: it then uses this contact right away to carry out pending commands.
The detail page shows pending commands in red with a time. Using the X, you withdraw a command as long as the camera hasn't picked it up yet.
Your recordings are not affected by this – the camera sends them immediately with every movement. The queue concerns only commands that go from you to the camera.
How the queue and the communication interval are connected, and which interval has proven itself in the field, is explained in our guide Understanding the queue & communication interval.
Your Modernhunter SIM cards – at a glance
The camera transmits over a SIM card. The app lists them all in a dedicated overview – with the summary at the top: how many cards in total, how many are active, paused or blocked.
Each card shows its number, the connected device and the last contact. Using the slider, you switch off each individual card. This also works via the camera page – more on that in the next chapter.
If you want to add a new Modernhunter SIM card, that's also done via this page: tap the plus at the top right. Then scan the barcode on the SIM card or enter the number by hand – this activates the SIM card. The assignment to a camera then happens automatically as soon as a camera with this SIM card signs in to the Modernhunter server.
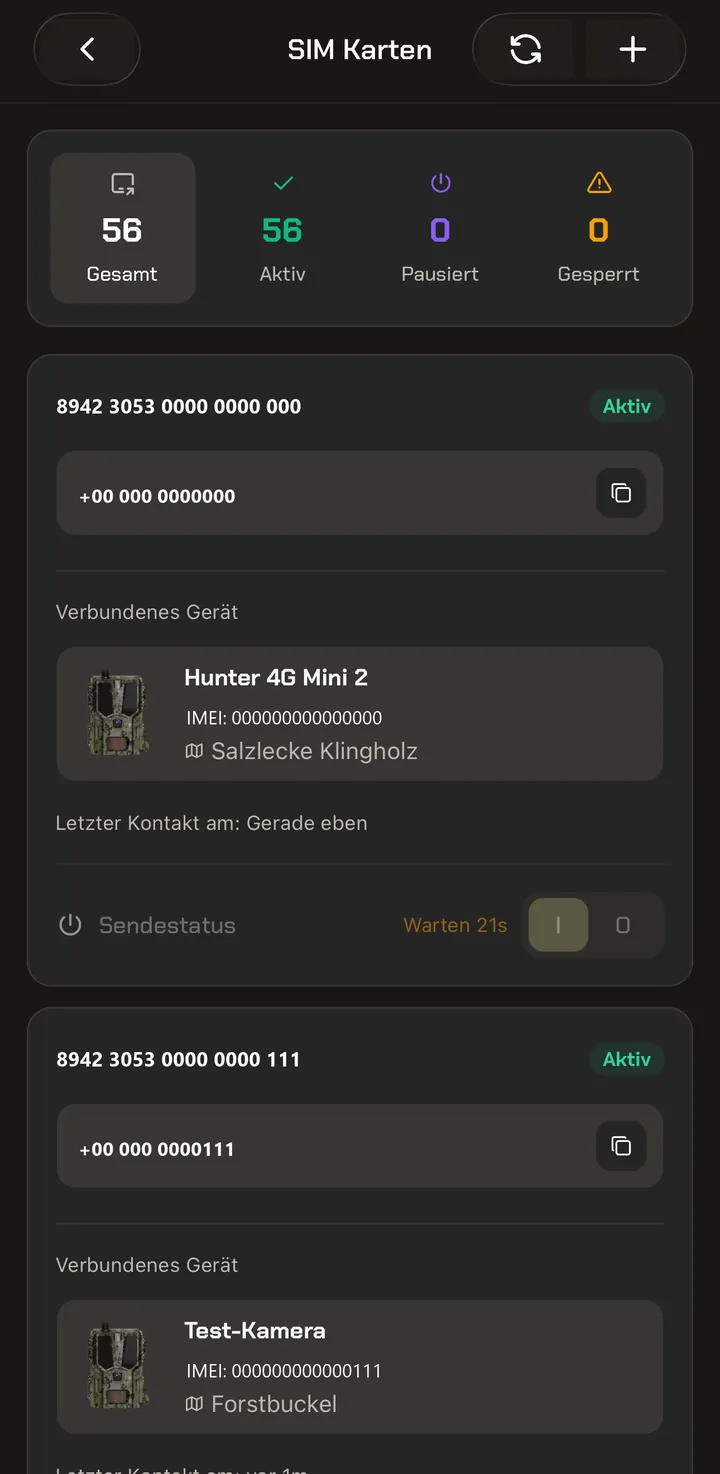
SIM in detail – number, status, connection
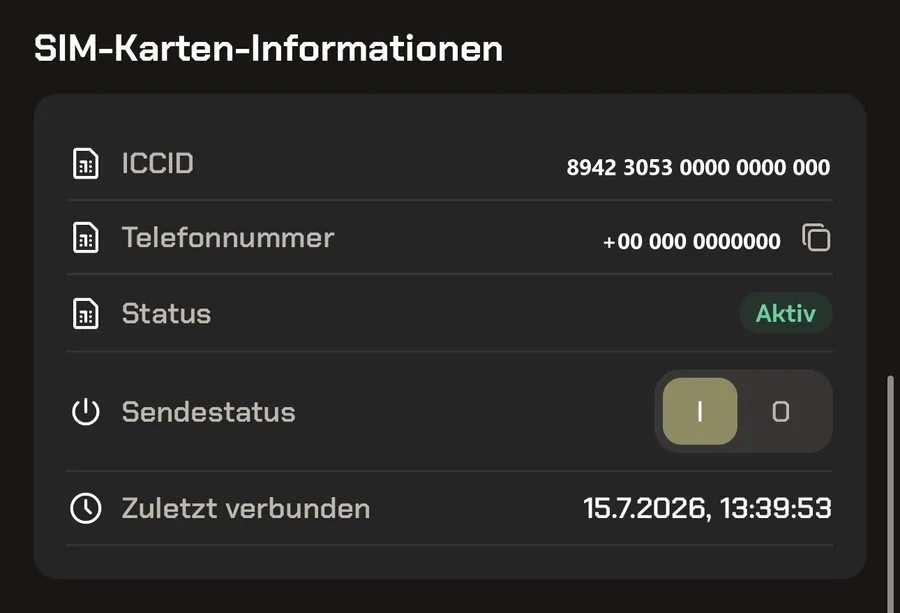
For every card there's a detail view with the ICCID (the SIM's serial number), the phone number, the status and the time of the last connection. You'll rarely need this information day to day – but when a camera isn't transmitting, it's the first thing our support asks for.
You can also reach the same information directly via the camera: on the camera page, select a camera and scroll down a little – there you'll find the details of the SIM card currently in that camera.
The decisive element there is the “Send status” slider and the status above it. Active means: the SIM card is switched on, the camera can connect to the network and send recordings. If you operate the slider, the status changes to Paused – the SIM card is then switched off and no more recordings are sent.
This unremarkable slider was a much-requested feature: deliberately switching off a camera's send function. That's exactly what it makes possible – and it's new in the app. So when there's talk of “switching the send function on or off”, that means this slider.
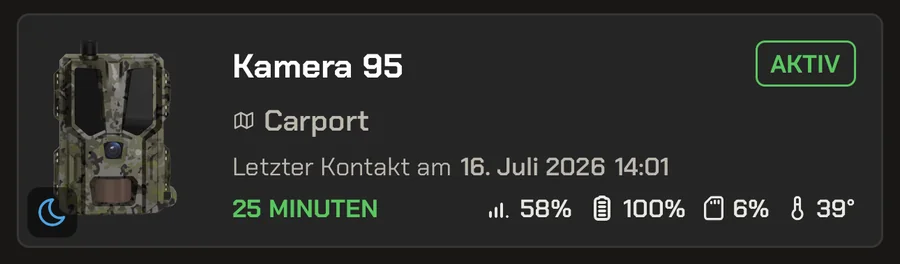
If the send status is set to Paused, the SIM card “sleeps” – not the camera. The camera keeps recording and saves everything to its SD card; only the internet connection is missing, so no recordings are sent. Only when you operate the slider again is the SIM card woken up and active once more.
In the camera overview you can recognize a paused card by a moon icon on the tile.
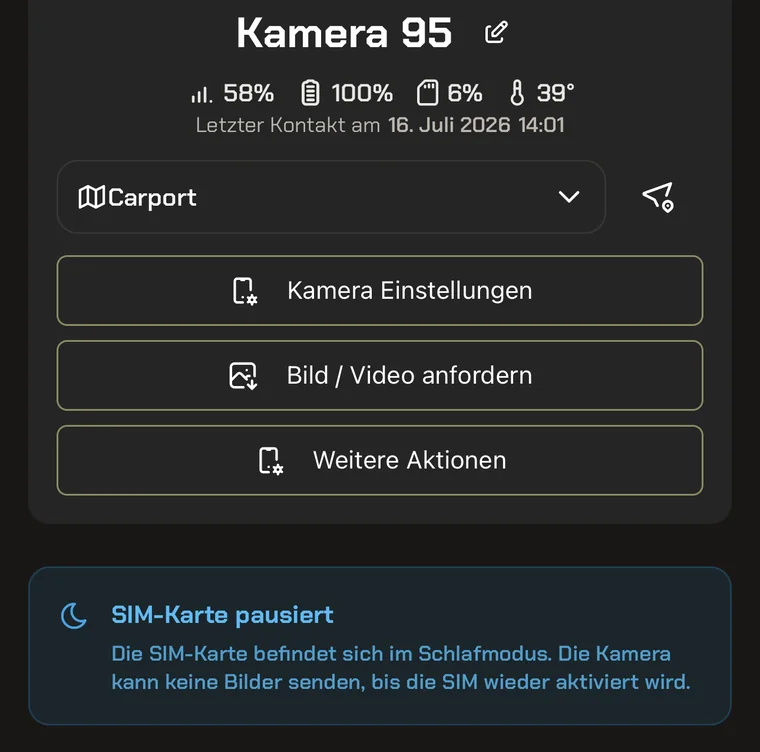
If you tap such a camera, its detail page points this out too: the note “SIM card paused” explains that no images are sent until the SIM card is reactivated.
Display – the app to your taste
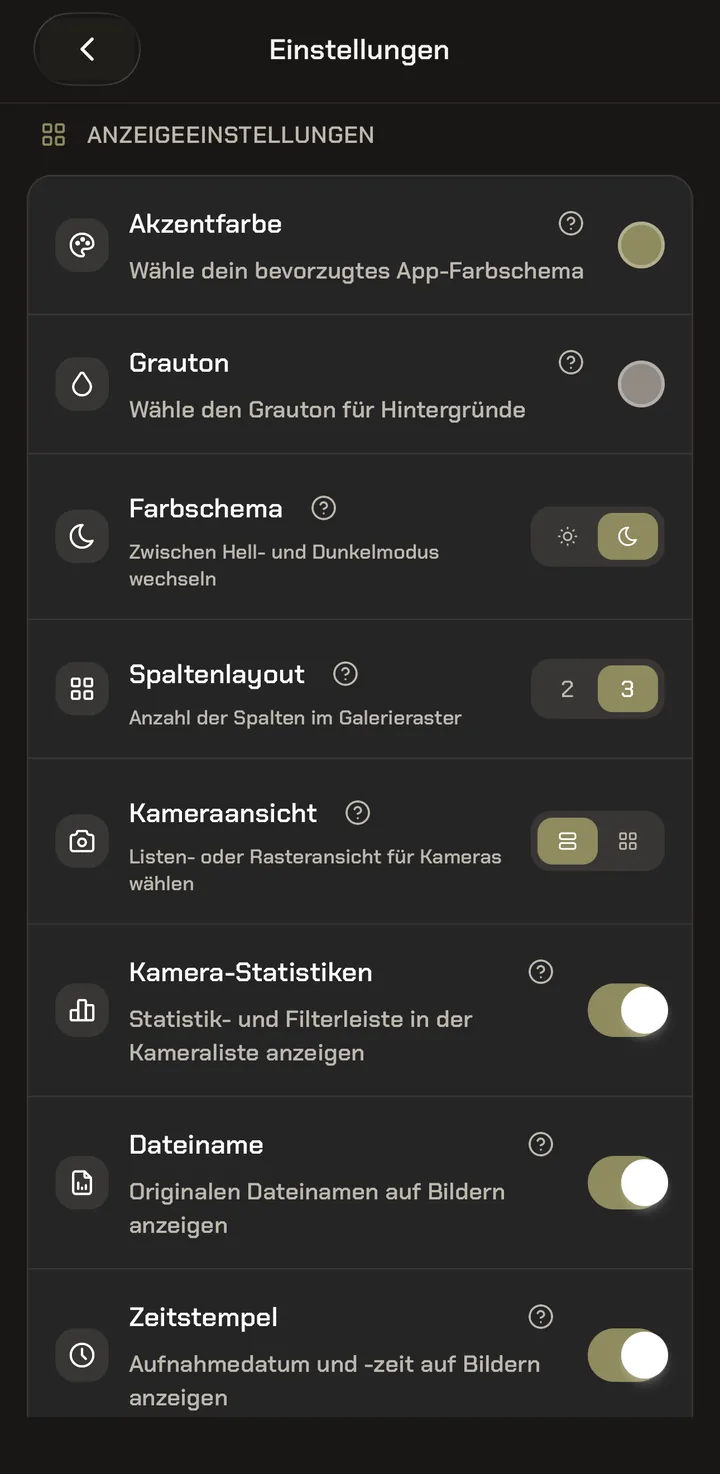
Very many of these setting options are new. The app's default configuration is deliberately chosen so that you can work well with it straight away – but beyond that, you set the app up entirely to your taste.
Under Settings you adjust how the app looks. Accent color and gray tone determine the color scheme; color scheme switches between light and dark mode.
The column layout determines whether the gallery grid shows two or three recordings side by side – two columns mean larger preview images. The camera view remembers whether you prefer list or grid.
Below, you turn additional information on the images on or off: the statistics bar in the camera list, the original file name and the timestamp with recording date and time.
Your wish
for the app?
Missing a feature, or would you have liked something done differently? Send us an email. We review every suggestion and, where possible, take it into account in one of the next app versions.
support@modernhunter.de